We all know that diamonds form deep within the Earth over millions of years under immense pressure. However, these are rough diamonds and do not resemble the sparkling gems we’re familiar with. So, how do they transform from rough stones to polished jewels? What impact does this process have on their value, price, and beauty? And how can you obtain the most beautifully cut diamonds? This blog will explain the entire diamond manufacturing process and serve as your comprehensive guide to diamond cutting.
Step 1 : Planning
Imagine a rough diamond as a klump of cookie dough. Planning it is like deciding what kind of cookies you’ll make. Here’s why it’s super important:
- Choosing the cookie shape: You can make round cookies, squares, hearts, or anything else! Planning a diamond is similar. You decide the final shape – round, oval, or something fancy.
- Getting the most cookies out of the dough: With good planning, you waste as little dough as possible and get lots of cookies. Diamond planning works the same way. It figures out how to cut the rough stone to get the biggest and most valuable final gem.
- Perfect cookies, no mistakes: If you mess up mixing the dough, the cookies might not turn out right. Planning a diamond is like that too. A mistake here means you might waste parts of the diamond or end up with a less valuable final stone.
So, planning is like the recipe for your perfect diamond cookies. It makes all the difference!
Process
First, an experienced diamond cutter examines the rough diamond manually and with software. They analyze the diamond’s size, shape, clarity, and crystal direction to decide the best shape, minimizing waste and maximizing quality and value.
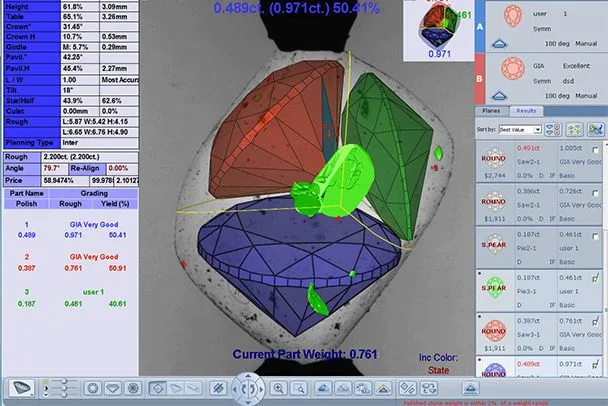
Next, the cutter plans the proportion and quality of the facets (symmetry and polish) using computer simulations. A ‘Sarin Machine’ is typically used to create accurate measurements and 3D models to optimize the rough stone.
This process requires expertise in diamond cutting, as it is the cut that determines the diamond’s possibility to reflect light which ultimately affects its end-value.
Step 2: Marking
Once the diamond is planned and the best shape and size are determined, it is then marked.
As the name suggests, “marking” involves indicating where and how the cuts should be made on the diamond.
Process
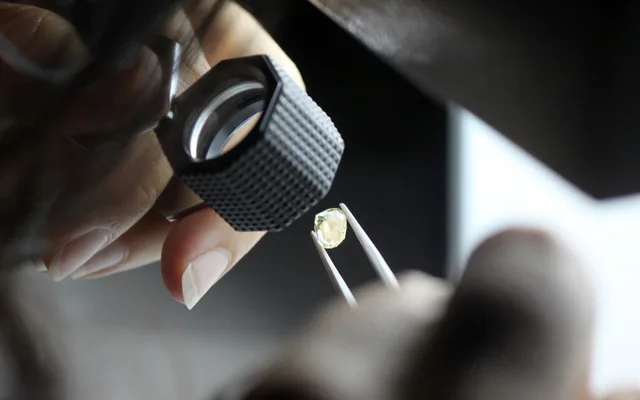
Diamond marking involves examining and measuring the dimensions of the rough stone under a magnifying glass. It’s crucial because it determines the final value of the diamond by retaining a percentage of its weight and color.
Even tiny flaws in the marking process can greatly affect the clarity grade of the finished diamond. It’s often better to cut a few smaller stones with higher clarity grades than one large stone with a lower clarity grade.
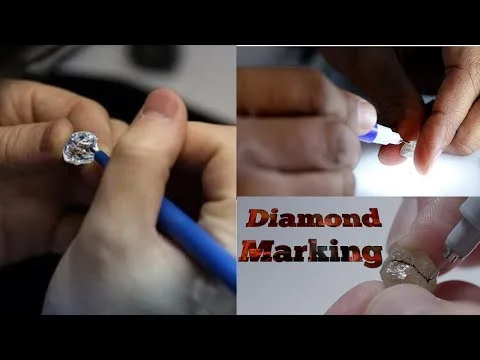
But sometimes, the experts compromise on weight retention and go for lower carat-weight to avoid any inclusions in the finished diamond and sometimes they mark slightly bigger proportions considering the possible weight loss in cutting and polishing.
In colored rough stones, the cut is critical to retain the same color in the finished diamond. Many cuts such as radiant cuts intensify the original color of the rough stone in the finished diamond.
Step 3: Cleaving/Sawing
This is the stage where the diamond undergoes the actual “trimming” process, where it is either split or sawn according to the markings made on it
Process
This step involves dividing the rough stone into separate pieces, which can be achieved through either cleaving or sawing.
The primary distinction between cleaving and sawing lies in the cutting tool employed. Cleaving typically utilizes a hammer-like tool with a blade, whereas sawing employs contactless tools such as lasers. Sawing is often preferred for irregularly shaped rough stones.
Before splitting the stone, it’s crucial to carefully assess its weak points, known as cleavage lines. Each stone has a unique pattern of these weak lines, and the cutting angle must be planned accordingly.
The marked rough stone is then positioned on a spinning sawing spindle, rotating at approximately 3000 rpm. The spindle’s blade, made of copper and coated with a mixture of oil and diamond powder, is used. By gently tapping along the marked lines, the rough stone is split into parts with the aid of diamond powder, as only diamond can effectively cut another diamond.
Step 4: Bruting
Bruting refines the rough cuts made during cleaving and sawing, achieving precision and refinement in the diamond’s shape and measurements.
Process
Bruting, which refines the diamond’s shape, can be done in three ways: using lasers, rubbing the stone with other diamonds in opposite directions, or using disks with diamond dust.
It’s both an art and a science. During bruting, friction is created to gradually shape the diamond’s corners into a round shape through abrasion, giving it a smooth finish.

Step 5: Polishing
Again just like the name suggests, polishing is the step in which the diamond achieves radiance and sparkle. It also involves the forming and shaping of diamond facets. It should be done in a way that optimizes the reflection and refraction of the white light that brings sparkle and scintillation in the diamond.
Process
Diamond polishing is done in 2 steps
- Blocking
- Brillianteering
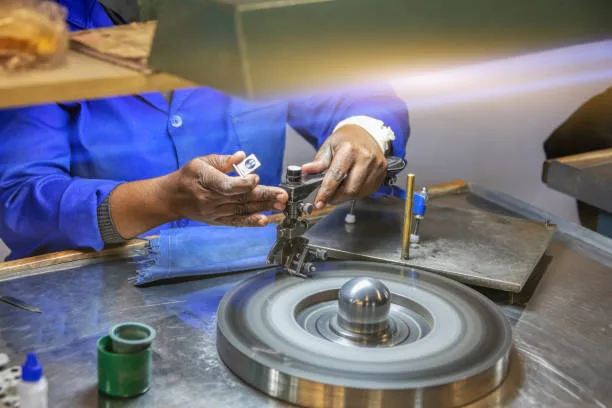
During the blocking stage, the diamond’s primary facets, including 8 pavilion, 8 crown, 1 cutlet, and 1 table, are shaped. This is achieved by placing the diamond on a tool called a tang and polishing the 4 main crown and 4 main pavilion facets on a rotating scaife.
These facets are then further refined to create the remaining 4 facets on the top and bottom, completing the main 8 facets. This process essentially creates a blueprint for the final single-cut stone.
In brillianteering, the diamond’s final polishing is completed by adding the remaining facets, resulting in a total of 58 facets (though this number can vary depending on the diamond’s shape).
Final Inspection
Once the diamond is polished, it’s carefully cleaned with acids and undergoes a final inspection. Then, it’s sent to gemological laboratories for grading.
During inspection, it’s checked against quality standards like shape, symmetry, cut, and polish. If necessary, the diamond is sent back to the polishers for improvement
